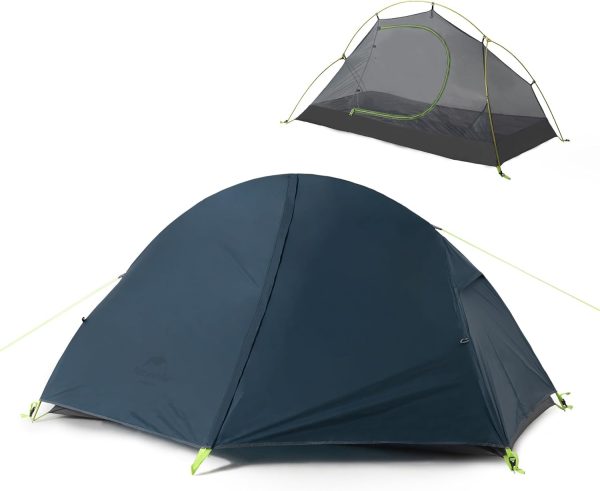
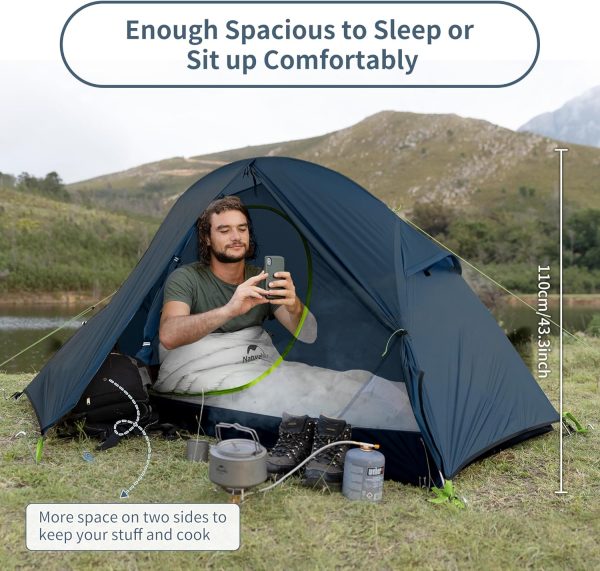
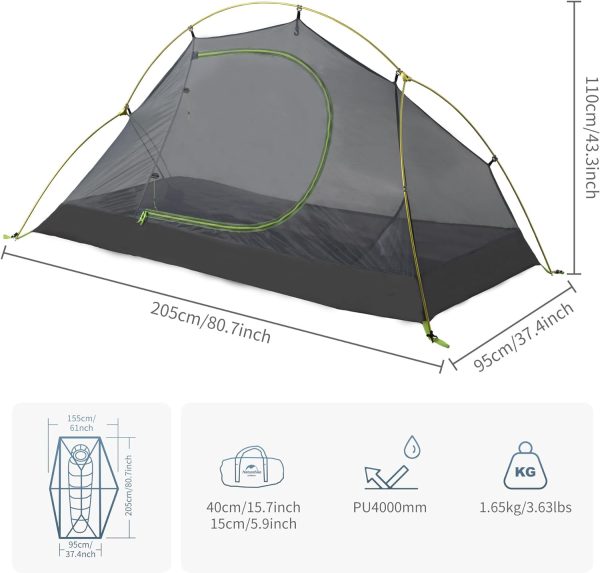
Naturehike 1 Person Ultra Light Cycling Tent 20D

$ 91.75
Description Naturehike 1-person tent is great for camping, hiking, cycling, backpacking, festivals outdoors, or a weekend backpacking trip with family and friends. LARGE SIZE FOR 1 PERSON — Double layers. Inner layer size: 80.7”(L) x 37.4”(W) x 43.3”(H). Outer layer with extra 24” long vestibule for storage room, compact and spacious. Ultralight Weight: 1.64 Kg/3.63 lbs with 20D version(including accessories). FULLY SEAM WATERPROOF & DURABLE — Rainfly: 20D nylon, silicon coated(PU 4000mm) with excellent UV resistance(UPF 30 ); Inner tent: 210T ripstop fabric(PU 3000mm), can support most heavy wind, rain and snow. PACKS SMALL & STURDY — It can be stored in the 15.7” x φ5.9” (40 x φ15cm) bag, making it super portable. This 1 person tent is suitable for 3-4 seasons and is preferred for hiking, cycling, expeditions, fishing, kayaking, car camping, backpacking, and bikepacking. INSTANT EASY SETUP TENT — Free-standing design with 7001 aluminum poles, quick and easy to help you set up or take down the tent in less than 2 minutes. You can move and relocate it without disassembling it. 100% SATISFACTION GUARANTEE  Fabric material: 20D nylon-coated silicon fabric. Inner material: 210T rip-stop polyester B3 breathable mesh 150D rip-stop oxford” Waterproof index: PU4000mm/PU3000mm” Poles: 7001 aluminum alloy” Weight (including accessories): 20D series about 1.6KG/3.63lbs” Accessories: Inner tent/Tent fly/Outer bag/Pole/Bandage/Nail x 8/Mat/Wind ropex2″ Expanded size: 80.7*61.4*43.3in”
placeholder
Session 1

Go over size selection
Fit recommendations
Pattern & Fit Adjustments
Materials needed
Preparing your pattern
Briefly discuss cutting layouts

Session 2

Step 5 – Apply Your Fusible Interfacing
Step 6 – Assemble Your Front Yoke Pieces
Ride The Wave *sewing with curves overview*
Step 7 – Assemble Your Back Pieces
Step 8 – Assemble Your Pockets
Step 9 – Sew Your Bound Buttonholes

Session 3

Step 10 – Apply Your Front Pieces
Step 11 – Sew Your Shoulder Seams
Step 12 – Assemble Your Left Sleeve
Step 13 – Attach Your Sleeves
Step 14 – Sew Your Side Seams & Sleeve Seams

Session 4

Step 15 – Finish Your Sleeve Hems
Step 16 – Attach Your Collar
Step 17 – Insert Your Zipper
Step 18 – Finish Your Hem

FYI: You will need to login to an existing account or make a new account before purchasing the workshop in order to access the videos smoothly!


ADD TO CART:

YOU WILL MAKE:

  • A jacket
  • Optional sizes from XXS-1X B-Block
  • Optional sizes from XXL-8X B-Block

YOU WILL NEED:

  • The It Takes Two Jacket PDF pattern
  • Color A fabric
  • Color B fabric
  • Lightweight to midweight fusible interfacing
    • *you may need different color interfacings for more extreme contrast color fabrics (such as black & white)
  • Matching all-purpose thread to your fabric
    • *you may wish to have matching thread to both your Color A and Color B fabrics on hand
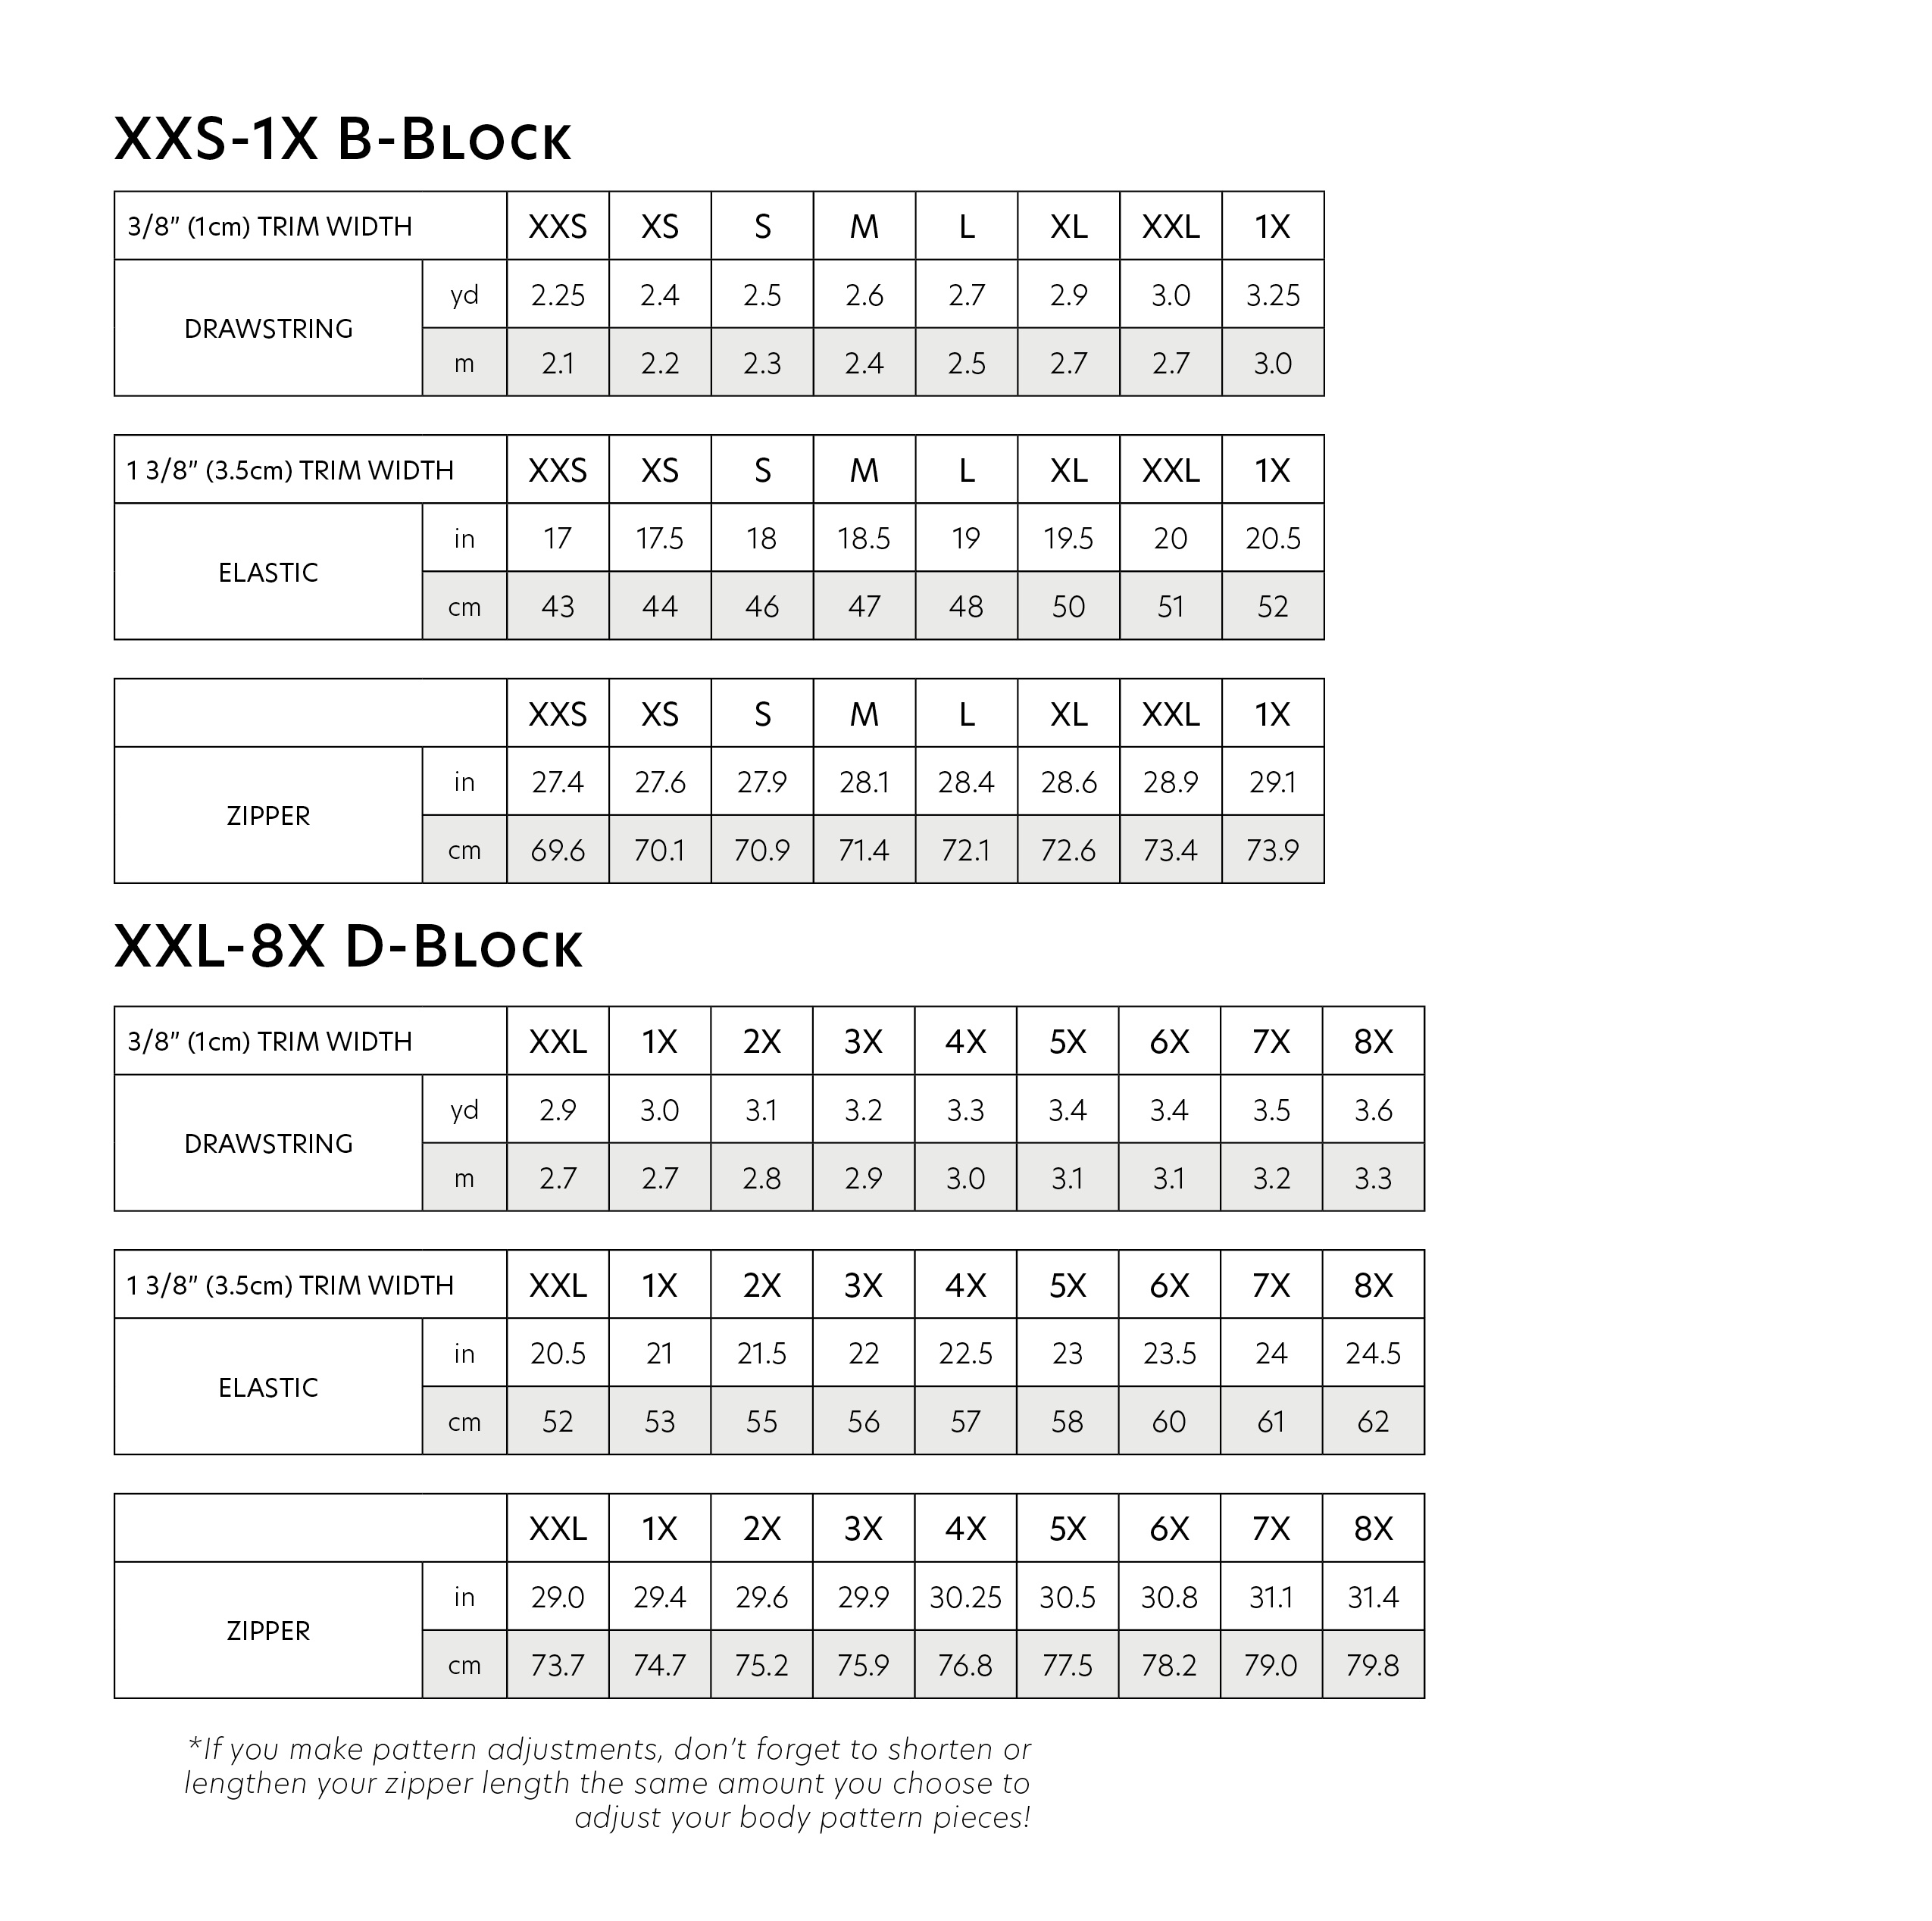
  • 1x separating zipper
    • *see length requirements per size below
  • 3/8” (1cm) width drawstring trim
    • *see length requirements per size below
  • 1 3/8” (3.5cm) width soft elastic
    • *see length requirements per size below
Please note this workshop focuses on the self enclosed finishes included in the instruction booklet, specifically designed for woven fabrics. The videos will go in depth covering French seams, bias binding, and bound buttonhole construction methods. This workshop is NOT intended for makers looking to sew a KNIT FABRIC version of this pattern. Feel free to reach out: email [email protected] for any questions!
0
Your Cart